
The lack of good tools to truly understand end-user experiences within a virtual environment is truly mind-boggling. Originally a good friend and colleague (Chris Crabtree) came to me with the idea that he could cook up a home-brewed solution to create synthetic logins in a trackable systematic approach. He did just that. Shortly after, we discovered this very same thing could be accomplished within the Power Platform with a bit of effort.
Customer experiences are very dependent on perception. In this adventure, we will explore how Power Automate can be used to better understand this perception and drive decision with synthetic transactions.
That being said, depending on the scenario things can get a bit hairy. Consider this: Maybe launching a session locally on a physical machine is easily accessed by just obtaining logs or using a 3rd party tool such as Control Up, but what if users are accessing a virtual session via a thin client endpoint with an embedded digital identity mechanism? We now have a few levels of inception here. Thin Client > Embedded SSO > Virtual Session > OS
How do we capture the entire process? The answer: Power Automate. Let’s get automating!
Components:
- Server to run desktop flow in unattended mode from cloud (RPA License Required)
- Data source to get and put data
- VNC Viewer (or other remoting tool) I use Tight VNC as I have IGEL endpoints.
General Flow:
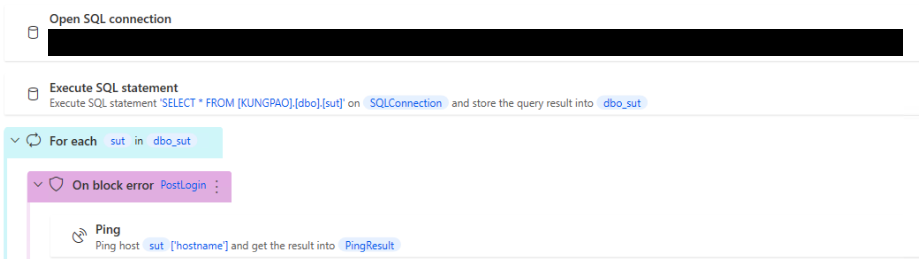
- Open data source (SQL for me) connection and get machines used for testing
- Get machine status FOR EACH (Ping)
- If Online, Open VNC Connection, perform actions inside the window using image recognition as visual markers (we are using image recognition since we have to traverse the stack)
- Measure variables e.g., timestamps, visuals, services
- Get VDI machine name via API
- Log off or disconnect user via API
- Send the measures back to a data source
- Put the lipstick on the pig in Power BI
In Depth
To start, I’ve selected a number of IGEL thin clients spread out over different geographical regions. I’ve entered all the relevant data in my data source.

Next we are going to pull that data from SQL, check the status of the machine as an IF statement.
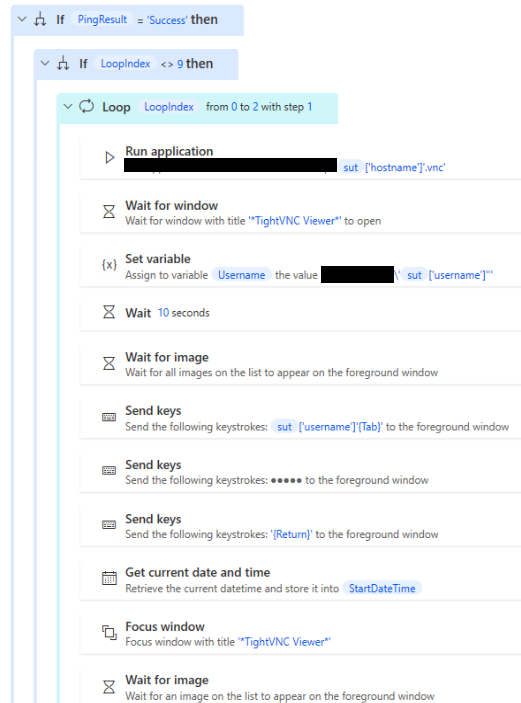
OK, now we are ready to do the work on the machine. If the ping was successful perform the actions below if still inside the loop. Run the VNC connection which for me is just a shortcut with the connection already saved inside the shortcut. Login by obtaining your creds from your favorite secured/encrypted source and set your Timestamps. In my case, I want to know how long it will take for a user to login after the moment they send off their creds.
Once in the desktop we need one important item. The virtual machine name. This will be used for useful data in Power BI as well as to call upon Power CLI or another API method to logoff or disconnect from the machine. As a side note, of course you could just click logoff or issue a command to the machine, but trust me, your API is going to be much more reliable.
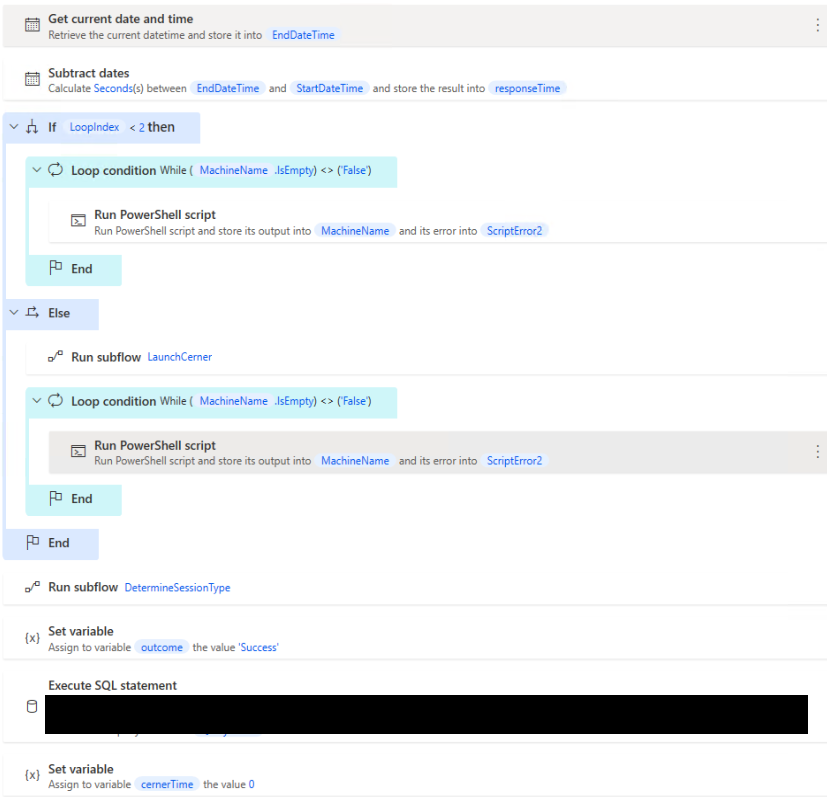
In our case we use Power CLI to get the machine name and disconnect or logoff depending on the iterations. We do a few iterations because the time it takes an end-user to return to a session in that state is important. See below for a pretty sweet script by my pal Nick Burton.
##Create API Session

$Cs = Connect-HVServer -Server '<ServerName>' -User <Domain>\powerclisvc -Password $Password | Out-Null
$egguser = %Username%
$globalsessions = Get-HVGlobalSession
$globalsessions.NamesData.BaseNames | Where-Object {$_.UserName -eq $egguser} |Select -ExpandProperty MachineOrRDSServerDNS
$hvservices = $global:DefaultHVServers.ExtensionData
$targetsession = $globalsessions | Where-Object {$_.NamesData.BaseNames.UserName -eq $egguser}
$hvservices.session.Session_Logoff($targetsession.id)
I’m using PowerShell in the above, but you could easily use Power Automate Web Service action. Parse the JSON response either way to reuse the token until the job is done. As mentioned above this gets the machine name of the current needed session and also performs a disconnect. Any other actions that need measurement or output should be done before this step.
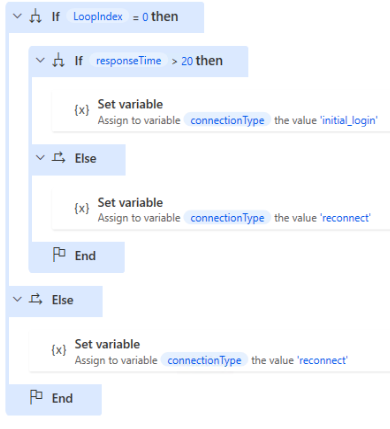
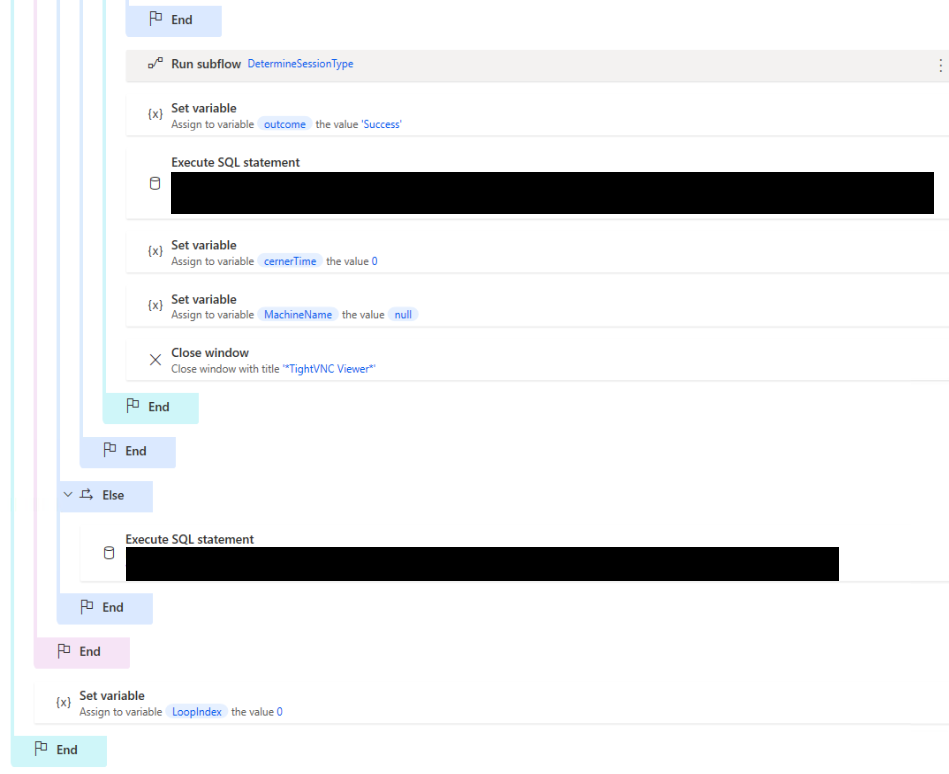
Before we send all the collected data to the DB, we can also get the session type. Disconnect vs Connect. This can be done with the API as well or you can quickly determine from some boundaries. Just make sure either way that there is no disruption of logic.
In closing a few things. Once we have all the data, we need to ship that back over to a data source. Again, I am using SQL and have shipped this off to a new database.
Erroring Handling:
Since we are going through a few layers of the multiverse here, sometimes things just get wonky. Do you best to mitigate any issues that might present themselves via conditions and error handling but we are just looking for a high score. To improve my chances of success, I’ve encompassed the whole process in an error block that executes a sub-flow if there are any issues, and we kick that off as an Outcome = “Failure”.
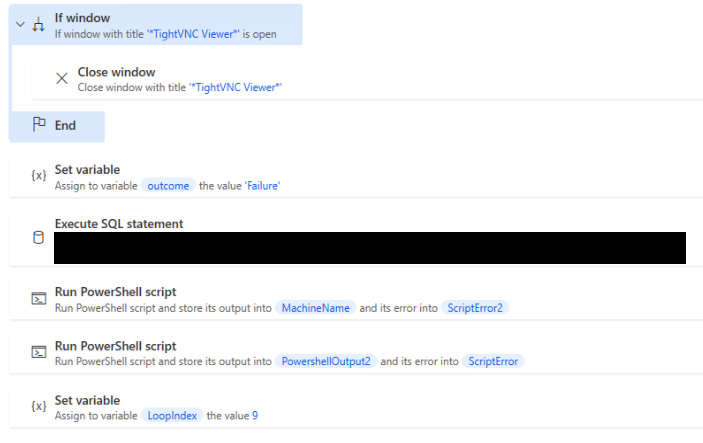
Failure does a number of things to help get us back to a good state on the next cycle. Again we are using API here to restart the session (Kill the VM) and restart the IGEL Thin Client.
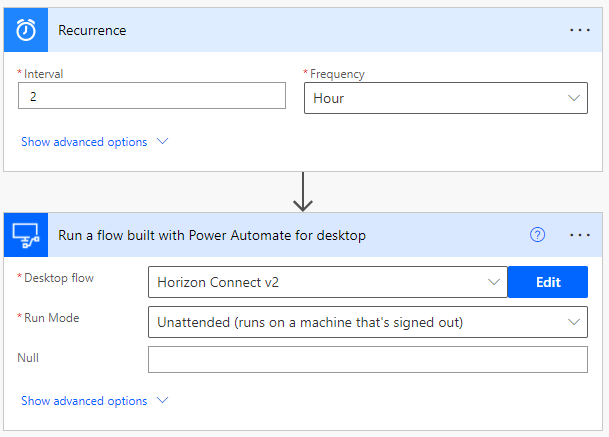
Now that we have our desktop flow created and we have ensured its working we need to hop over to the cloud and schedule this bad boy to run around the clock if so desired. This one is pretty simple since its a one way street and all the work is being done on the Desktop side with this particular solution. All we need to do here is create a cloud flow with a run trigger, in my case it was a recurrence, and then run the Desktop flow.
As and additional Desktop to Cloud Flow, we can use Our SUT database to preform periodic health checks on the devices listed e.g., device unplugged. So now we have our data being populated, things are groovy. Now what? Step on over to the 2nd part of this series for an overview on how to tell a story with this data in Power BI.